S2I Webhooks for CICD
Leveraging Source-to-Image (S2I) webhooks for automated deployment#
If we'd like to automatically trigger a build and deploy anytime we change the source code we can do that by using a webhook.
See Triggering Builds for more details.
Get the trigger secret#
Retrieve the GitHub webhook trigger secret using the command below. You’ll need use this secret in the GitHub webhook URL.
oc get bc/ostoy-microservice -o=jsonpath='{.spec.triggers..github.secret}'
You will get a response similar to:
o_3x9M1qoI2Wj_cz1WiK
Note the secret as you will need to use it shortly.
Retrieve the GitHub webhook trigger URL#
You will need to get the GitHub webhook trigger URL from the buildconfig. Use following command to retrieve it
oc describe bc/ostoy-microservice
You will get a response with much data but look about two-thirds the way down for the line that looks like:
[...]
Webhook GitHub:
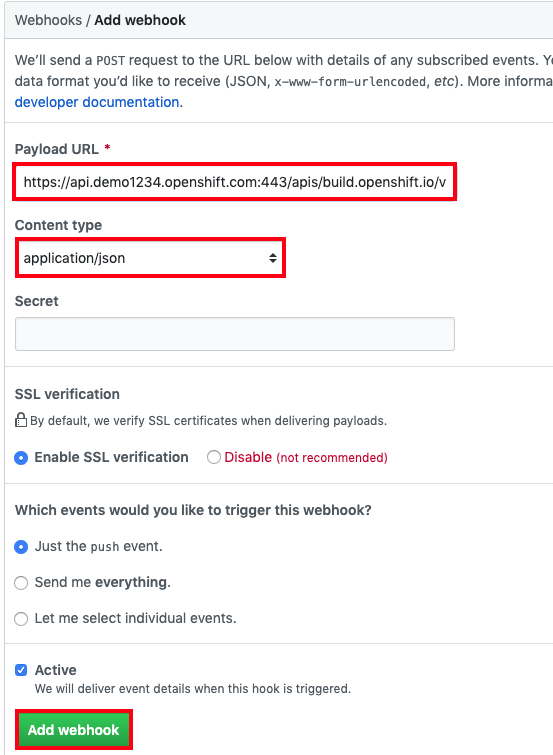
URL: https://api.demo1234.openshift.com:443/apis/build.openshift.io/v1/namespaces/ostoy-s2i/buildconfigs/ostoy/webhooks/<secret>/github
[...]
Replace the secret#
In the URL retrieved in the last step replace the <secret> text with the actual secret you received in step 1 above. Your URL will look like:
https://api.demo1234.openshift.com:443/apis/build.openshift.io/v1/namespaces/ostoy-s2i/buildconfigs/ostoy-microservice/webhooks/o_3x9M1qoI2Wj_czR1WiK/github
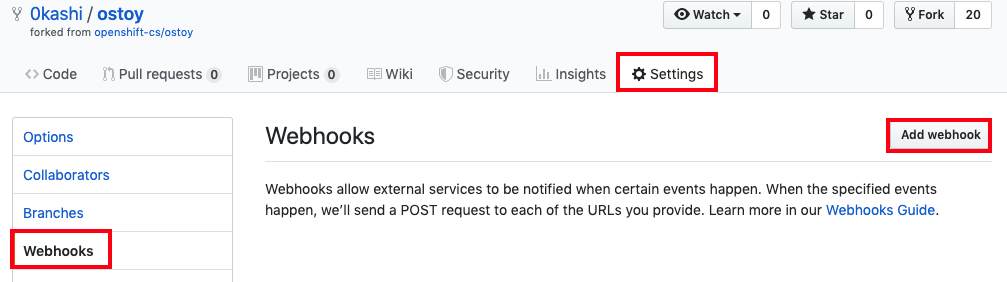
Setup the webhook URL in GitHub repository#
-
In your repository, click on Settings > Webhooks > Add webhook
-
Paste the URL from step 4 into the "Payload URL" field
- Change the "Content type" to
application/json -
Click add webhook at the bottom
You should see a message from GitHub stating that your webhook was successfully configured. Now, whenever you push a change to your GitHub repository, a new build will automatically start, and upon a successful build a new deployment will start.
Make a change and see the update#
Now we will make a change in our source code and see it automatically trigger a build and deployment. We saw in our Networking section that the colors of the box randomly change colors. Now we will make that box only display greyscale.
-
Go to the source code in your repository
https://github.com/<username>/ostoy/blob/master/microservice/app.js -
Edit the file
- Comment out line 8 (containing
let randomColor = getRandomColor();) -
Uncomment line 9 (containing
let randomColor = getRandomGrayScaleColor();) -
Enter a message for the update like "changed box to greyscale colors"
- Click Commit at the bottom to commit the changes to the master branch
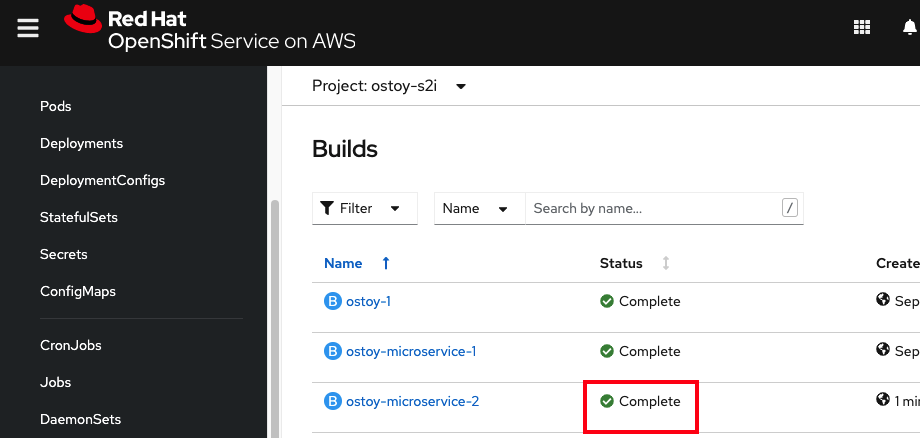
View the build run and Deployment complete#
Immediately, in your cluster web UI, click under Builds > Builds and you will see that it says "running" then it will show "complete". Once complete the deployment begins. You can also check the status by running oc status.
View change in browser#
Once the deployment has finished go back to OSToy app in your browser, access the Networking menu item on the left. You will now see that the box color is limited to greyscale colors only.